Ecotech EZ Variable Speed Pool Pump Motor - Pump Installation and Piping Upgrades

Now that the pump is assembled with the new Ecotech EZ variable speed motor, it was time to get at the piping upgrades to help improve the overall system efficiency. I had a few serious weaknesses in my pool piping, particularly on the suction of the pool pump, and the piping feeding and exiting the thermopump.

Jacuzzi Magnum 1500 upgraded with Ecotech EZ Variable Speed Motor, Suction Side Piping Completed with 2 Jandy Valves
The existing pump piping layout wasn't very well done - it wasn't particularly efficient, and probably contributed to the pump cavitating any time the vacuum port was used. Note the vacuum port routing - which enters from the top right - 90 degree elbow, ball valve, 270 degree sweep, 90 degree elbow down into a T fitting, then off to the pump suction. All lines are 1 1/2" - so even if you decide to draw from the drain and the skimmer at the same time, you're contstrained by the 1 1/2" suction on the pump.

Old pump suction layout - skimmer bottom left, bottom drain top left, vacuum port top right, pump suction bottom right. 
I have 1 1/2" black poly pipe running underground to the pool. I'm not a huge fan of the insert barbed fittings - they're common for these applications but they neck the diameter down to 1 1/4 inch. I thought I would give a polyethelene epoxy adhesive a try, to convert to PVC fittings, made by TAP plastics in California.

Black poly lines moved to desired alignment, fixed with copper strapping. CPVC reducing slip elbows - 1 1/2" to 2" - fixed to the black poly line using TAP plastics poly epoxy.
I also converted the 1 1/2" poly lines to 2" at the 90 degree elbows where I made the transition from vertical to horizontal. See photo above. Once my suction lines were horizontal, I plotted the position of two Jandy 3 way valves facing each other, to allow me full flexibility in selecting and mixing the pump suction source. I used the 2 / 2 1/2" Jandy Valves to minimize restriction in the suction piping.

Suction side piping completed - Jandy Valves control suction source - skimmer, bottom drain, or vacuum port. 2" union fittings on the suction and discharge of the Jacuzzi Magnum pump. 
With the suction side piping completed - I then working on the transitions at the sand filter. I spent some time looking for a sand filter with a 2" multiport valve - mine was just a 1 1/2" multiport valve, and eventually decided just to keep the 1 1/2" valve. With the variable speed pump - the system would in the future be spending most of the time operating at a low flow speed, which would minimize the impact of the system restriction of the 1 1/2" multiport valve.

Jaccuzzi Multiport Sand Filter Valve Piping - 1 1/2" drain fitting on the close side, 2" rigid pipe discharging to the thermopump and salt cell on the far side. Pump discharge - sand filter feed line in the center. Unions on all connections. 
With the sand filter piped, it was time to work on the thermopump. The former layout had the thermopump piping side facing away from the pool shack, and 90 degrees away from the pool. In order to make the connections, about 30' of 1 1/2" hose made long circular connections between the sand filter and the salt cell.

The old Thermopump Installation - About 30' of 1 1/2" hose separates the Sand Filter from the connection to the underground hose where the Salt Cell will be attached to

The old Thermopump Installation - About 30' of 1 1/2" hose separates the Sand Filter from the connection to the underground hose where the Salt Cell will be attached to - right side of photo.
I moved the thermopump so that the piping connections would be facing the pool, and perpendicular to the pool shack, and then came up with a layout using the Jandy 3 way valves to control bypass and flow to the thermopump. 

The Thermopump was previously installed on the patio stones to the right. It's now moved into place next to the pool shack, just behind the outlet pipe for the pool jets. 

Jandy Valves will provide flow modulation and bypass isolation for the thermopump, with a much more compact piping arrangement.
Now, instead of 30' of 1 1/2" pipe between the sand filter and the salt cell, I'm down to about 10' of 2" pipe

Conclusions

I'm quite happy with the new piping arrangement and the upgrade to 2" piping. The only section of 1 1/2" pipe which remains is the section about 35' long between the salt cell and the first jet on the pool. I don't think I'll get the energy to make that upgrade for a while because of the trenching, so I'll wait until the pool requires major maintenance.

At this point, it was time to start the new variable speed motor - more on my next post.

Sources and Links

I hope you found this post useful. Feel free to ask questions in the comments section below. I answer all questions.

Share:

Ecotech EZ Variable Speed Pool Pump Motor Upgrade - Jacuzzi Magnum Pump

I've been working towards the goal of reducing my electricity bill by 33% - and I'm actually getting there. One of the largest loads besides heating and ventilation at my house is the pool pump. I have a typical single speed 1.5 HP Jacuzzi Magnum pool pump for an 18' x 36" rectangular in-ground pool. I like to open the pool early and close it late, and the kids love to swim. My estimates for running the Jacuzzi Magnum pump was around $500 / pool season full time. I've been running the pump on a time, for about 12 hours / day - so I guess I've actually been consuming around $300 per year in electricity. Thankfully, my marginal electricity cost is only about $0.095/kW-hr.

Ecotech EZ Motor installed on the Jacuzzi Magnum 1500 Pool Pump. The control panel is directly on top of the motor.
Last year I did a fair amount of research on the subject. and the key to saving electricity with a pool is to take advantage of pumping affinity law - which simply means that increasing the flow by 10% costs you 33% more in power. Similarly, reducing the flow by 25% will result in energy savings of approximately 50% - due to the reduction in friction losses by reducing the speed of the water in the piping (and importantly, across your filter element).

You can do this with multi-speed pumps - which can be standard wound-rotor pumps with a two or three speed tap - which will result in some savings, or even more significantly, with a electronically commutated permanent magnet variable speed motor, which are the most efficient commercially available motors. To take advantage of this simple principle, the state of California has mandated that new pool installations have as a minimum multi-speed pumps which default to low speed operation for filtration (California Energy Commission (CEC) Title 20 Appliance Efficiency Regulations).

My pool is probably a fairly typical installation for a 20 year old pool in the Province of Quebec - all the piping is 1 1/2 inches in diameter, and I have a 1.5 HP single speed motor, with a sand filter with a 1 1/2 inch multiport valve. My thermopump was added following the original pool installation - and it would have been difficult to imagine a less efficient plumbing addition to a system - to add the Thermopump - the pipe from the sand filter to the pool was extended by about 30 feet long in total - 1 1/2" piping - in a long serpentine.

So why upgrade just the motor, and not purchase a complete new pump? Because if you already have a decent pump - the motor will end up costing about 50% of the cost of a complete pump. If you're a bit handy, this isn't a particularly difficult upgrade. The hardest part may be the electrical part - and if you're switching the complete pump out - you'll need to deal with that anyway. My aim going into this upgrade is that the cost for the upgrade would be paid back within 2 years, and purchasing a complete new pump would not allow me to achieve that.

Starting point - Jacuzzi Magnum Pump with Single Speed, Permanent Split Capacitor Motor
So - to take best advantage of the variable speed motor upgrade, I also planned to upgrade as much of my piping as possible to 2" diameter, and relocate my thermopump to optimize the piping arrangement. I also planned to remove and replace all my 1 1/2" ball valves with 2 inch Jandy multiport valves - to simplify the plumbing and minimize the number of bends in the piping.

The first step in the project was to split the original single speed motor from the pump, and install the Ecotech EZ motor. This isn't terribly difficult to do, and it is also an excellent opportunity to replace your pump seal. The basic steps are as follows:
  • remove the pump from your system and disconnect the power;
  • split the pump from the motor by unscrewing the clamp ring between the motor and the pump;
  • unscrew the 2 screws retaining the diffuser, and lift the diffuser off;
  • unscrew the impeller by holding the motor end of the drive shaft, and unscrewing the impellor counter clockwise; 
  • lift off the seal housing (now is the time you would replace the motor shaft seals); 
  • unbolt the motor housing bracket (four bolts)
Preparing the Motor Housing Bracket for installation on the new Ecotech Motor
Note the clamp ring installed over the motor, with the seal plate installed over the motor housing bracket and motor shaft
Installing the impeller
Installation of the new motor is the reverse of the steps above, I won't go into details, there's quite a few good videos available explaining seal replacement on all types of pool pumps. Just ensure you take very clear note of the orientation of all parts during disassembly - photos will help. And - make sure you install the clamp ring right from the start - otherwise you'll be doing all the steps twice....

The Ecotech EZ motor installed on the Jacuzzi Magnum 1500 Pump - Ready to Install on the Pool
I'll write a separate post on the piping upgrade around the pump, sand filter and thermopump, Following that, I'll post about wiring up the new pump, the electrical considerations, power draw of the new motor, and the performance of the system. It's getting a bit too late to finish everything tonight.


Share:

Delta Vertical Wall Mount Bike Rack - from Lee Valley Tools

It's been a while since my last post - this spring has been exceptionally busy with the basement insulation project, basement floor slab crack repairs and concrete floor painting, the variable speed pool pump motor upgrade, and the 2" pool plumbing upgrade. I still have to write about the pool projects, but first I wanted to show some photos from my bike rack upgrade in the garage.

The completed installation - adult bikes mounted vertically on the wall - kids bikes parked underneath. Very space efficient, and easy for the kids.
The new house had a series of hooks on the ceiling - 10' off the floor, and over the railing next to the stairs to the basement. To lift a bike up or down from a hook, you would have to get close to the railing, and stretch to get the front or rear wheel on or off the hook on the ceiling - a real task. The bicycles would pivot on the hooks, and bang into each other - pretty frustrating at times. I wanted a solution that would keep the bikes off the floor - we need all the floor space to park 2 cars at times, and help keep the space neat.

The previous storage rack - bikes would swing around, handlebars would hook, not ideal.
I did a bit of research into vertical wall mount bike racks - there are some interesting designs - then I found these at Lee Valley Tools. The great thing about Lee Valley Tools - reasonable prices ($21 each), quick and inexpensive shipping (frequent free shipping promotions) and quick delivery. So - I ordered six and they arrived in 2 days.

Delta Cycles Vertical Bike Rack with Tire Tray
If you look at other vendors - sometimes they will sell the rack and the tire tray separately - the Lee Valley Tools packaging includes both for one price.

Mounting the racks was simple - I found my wall studs were spaced 16" - and decided to lay out all four racks for the adult bikes - 2 road bikes, 2 mountain bikes - on 16" centers with staggered heights so the handlebars wouldn't interfere with each other. 

First bike installed. I used a Laser Level to get the top and bottom trays vertically aligned. 
Here's a photo of all 4 bikes installed - 16" centers. This turned out to be perfect spacing. 12" spacing would not have been enough (although it might have worked if you need a very tight installation).

4 bikes - 16" centers
The bike hooks are solid, support the bikes well. I'm careful when installing the bikes on the hooks to let the weight down slowly on the hook, to make sure I don't over stress the wheel rim. The upper rack installs with two 1 1/2" screws provided with the kit. These screws are a bit too short if you're installing on a stud wall with drywall - you'll need longer hardware for a solid installation.

The supplied hardware is too short for drywalled walls - these screws are only suitable for mounting directly to wood studs.
Delta Bike Rack
And here's a photo of the bottom tray. The bottom tray mounts with self adhesive tape - no screws required although screw holes are provided.

Note the vintage green Michelin Wildgripper Sprint S tires - Kevlar beads, super light, and now getting very old and brittle. Time for new tires.....
In summary - good quality racks, very good price, simple installation, clean look when storing bikes - very satisfied with this system.


Share:

Basement Concrete Floor Paint - Single Part Epoxy Paint

Our 25 year old house has (had) a concrete floor in the basement utility room that was a bit more than rough. A spiderweb of hairline cracks, and some surface abrasion / weakness caused by lack of maintenance and efflorescence in certain places. It looked like the concrete had been painted at one time, but it was very difficult to tell.

The completed floor paint job.

Concrete prepared for painting - all cracks filled with Sika Epoxy Crack Fill
With the basement insulation project, where all the perimeter walls had to be cleared so that the drywall could be removed, and spray polyurethane foam insulation applied - it was the perfect time to paint the perimeter of the concrete floor. Prior to paint, I repaired all the floor cracks with Sika Crack Fix - from hairline cracks to the largest cracks which measured approximately 4mm wide at their widest. 15 tubes of Sika Crack Fix - $300 worth of epoxy - and all the cracks were filled and the floor ready to paint.

Cracks repaired that run into floor sump
For a concrete floor paint job, I highly recommend that you have a belt sander - it's perfect for smoothing out any surface roughness, high spots on epoxy crack fill, and buffing out any surface imprefections due to efflorescence. Since I just need a belt sander for this project, I bought an inexpensive Skil 3 x 18" belt sander - the 6A 7510 with pressure control. It's a nice tool, and was perfect for this job.

For paint - I decided to go with a simple single part epoxy. I did not want to get into two part epoxies requiring mixing of part A and part B - since I wouldn't have any heavy loads or vehicles on the floor. I also wanted a brand name product with a good reputation, commonly available at local building stores - so that I could restock easily, and hopefully procure the same product for touchups every couple of years.

I settled on the Kilz single part epoxy concrete floor paint - reasonably priced and with good online reviews, from a good manufacturer.


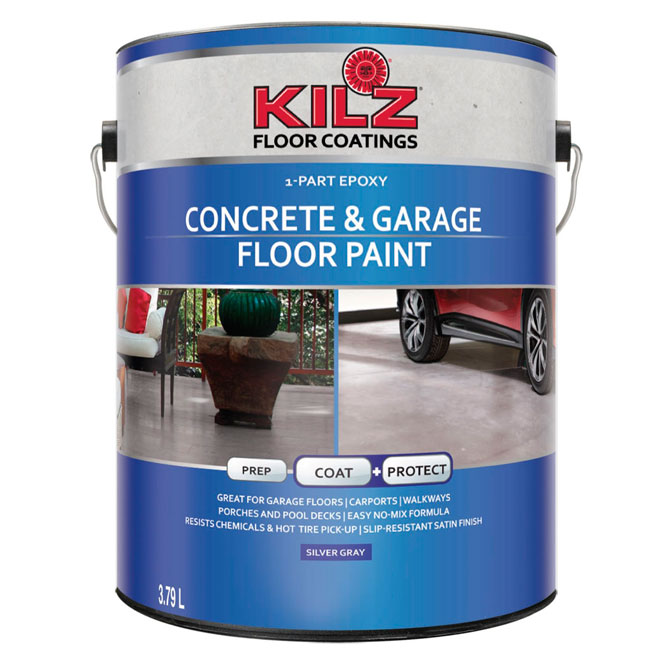
Kilz Concrete and Garage Floor Paint
I had several spots with efflorescence - a white crystalline staining in several spots on the floor - particularly around 3 or 4 concrete columns supporting the garage elevated slab. I chose to simply wash the efflorescence with the concrete wash product recommended by the paint instructions - KILZ Concrete & Masonry Cleaner & Degreaser.

Following the first coat of paint, I found that any places I had raised epoxy repairs, and I hadn't sanded the epoxy - I didn't get a particularly good bond of the paint to the epoxy. So for some spots, I went back and sanded down the epoxy crack fills with the belt sander, which also roughened the epoxy and improved adhesion of the paint.

Sanding down Epoxy crack repairs flush with the concrete
I also found that where I had heavy efflorescence stains, and I only cleaned with the KILZ Concrete & Masonry Cleaner & Degreaser, the paint puffed up as it dried, and gave very poor adhesion. So it was clear - I had to do a better job dealing with the efflorescence prior to painting.

Halo of efflorescence around concrete column - led to poor adhesion.
At the spots where I had poor adhesion - I used the belt sander to take the paint back down to the concrete, and physically remove any efflorescence from the surface. Then I used the recommended concrete etching product - KILZ Concrete & Masonry Cleaner & Etcher. This product was aggressive on the efflorescence, and soaked into the porous surface of the concrete - bubbling and hissing whereever it encountered the efflorescence. I then cleaned with rinse water, and let dry for 24 hours. When I went back to inspect the concrete - the concrete was perfectly clean, dry and natural coloured, except in a few spots where there was some new white efflorescence on the surface of the concrete - much less than before. So at these spots - I did a second treatment with the KILZ Concrete & Masonry Cleaner & Etcher, and waited another 24 hours. Following the second treatment, I had no further efflorescence on the surface of the concrete.

Efflorscence repair - sand down the paint, remove the efflorescence with Concrete Etch, and repair weak surfaces with a thin layer of Sika Epoxy Crack Fix
So - I then applied a second coat of paint - and so far - it seems to have beat the efflorescence, no puffiness or lack of adhesion in the paint, and better bonding of the paint to the epoxy crack fix.

Finally - I had spots of the concrete floor where there were small sections - up to a foot long by 6 inches wide - where the surface of the concrete had started crumbling slightly, leaving a rough surface. At these spots, I used Sika Crack Fix applied across the surface, spread out with a putty knife, and sanded flat with the belt sander once cured. This protected the concrete surface, and gave a nice smooth surface for the paint to adhere to.

Rough surface repair with Sika Epoxy Crack Fix - levels chips 
The final product look much much cleaner, and neat. A huge improvement. A bit of an investment in time and effort, but I think it should pay off when it comes time to sell the house.

Final floor repair


Share:

Basement Floor Slab - Horizontal Crack Repairs using Sika Crack Fix

The past three weeks we've been upgrading the basement foundation wall insulation - so I've had to move all the shelving and storage units away from the basement walls to get at the walls. Since all the heavy lifting was done to move everything away from the walls, I decided it was an excellent opportunity to give the concrete floors a coat of paint. Prior to painting, it was the perfect time to repair the horizontal cracks in the concrete slab - so I've been at this in parallel with the insulation job.

Final Crack Repair - Sika Crack Fix
Following some reasearch - I've settled on using Sika Crack Fix - a structural epoxy that is very fluid and can penetrate very narrow cracks, and is also commonly available at my local home improvement stores. It's not inexpensive, at about $20 a tube, but if I can get a permanent repair to these slab cracks I'll be satisfied.

Sika Crack Fix - Comes in a Cartridge designed for a standard small caulking gun, with two mixing tips. 

Cartridge installed in the caulking gun
The first step to a smooth repair is to open up the top of the cracks with an angle grinder and a concrete wheel. Create a groove at the top of the crack - 2 to 4 mm wide - and relatively straight - this will create a channel that will make the application of the epoxy much easier, and create a small well for the epoxy to pool before it penetrates the crack. This is the key to a neat, easy crack repair. When creating the groove with the grinder, use your shop vac with the hose end held right next to the grinder wheel, this will pick up 95% of the dust, and help keep your work area clean.

Groove the top of your cracks with an angle grinder prior to application of the epoxy
Once the cracks have been grooved, you can start applying the epoxy. Since I have no way of plugging the crack at the bottom of the slab - the epoxy is so thin it will run right down through the crack, and out the bottom of the slab. To minimize waste, I would apply one or two tubes of Sika Crack Fix to about 25 feet of prepared cracks - and allow the epoxy to penetrate the cracks. I would then wait 24 hours and repeat the process - to allow the crack to shrink in width over subsequent applications and minimize the leakage out the bottom of the crack.

Once the crack is filling up - you'll find that the epoxy will run horizontally as well - moving down any slope in the floor slab. This isn't a problem, it helps to distribute the epoxy fully through the crack, but you may find that some epoxy will pool out of the crack on the surface of the floor. The hardened epoxy is so hard that it is difficult to remove by scraping or sanding. After about 4 to 6 hours following the application of the epoxy - the epoxy will set up and start to harden - yet it will still be soft enough to scrape off any unwanted excess. This is an excellent time to level out any sections where the epoxy is convex - and extending above the surface of the surrounding floor. 

Completed crack repair - where the epoxy has been scraped flat before completely hardening. 
The Sika Crack Fix can also be used to fix broken surfaces - I have some small areas around a floor sump where the concrete surface has chipped away slighly exposing some aggregate. I've been using the Sika Crack Fix to smooth these areas prior to painting.

Wider surface repairs using Sika Crack Fix - This section is still slightly concave, and will require a subsequent application of Crack Fix to get it flat. 
I've used about 10 tubes of the Sika Crack Fix in about 40 feet of narrow cracks averaging about 1mm wide. That's a bit expensive at $20 a tube - but if it does a "permanent" long term repair - I'll be happy with that. It looks like the epoxy will have to be roughened prior to painting with sandpaper - if left to settle on its own it hardens very smooth - almost glass like, and I'll be looking for good adhesion with the floor paint. I'll post on the floor paint process later, as I get that task done.

Now - for a few other points now that I've almost finished all the crack repairs in the basement.

Sometimes, the part A and part B doesn't mix correctly, and won't harden in the crack. This may happen at the start of the tube, at the end of the tube, or if you interrupt application and restart with a new mixing tip. The instructions for the product suggest pouring out product in a waste container until all the air bubbles are gone - this ensures the product being applied has a proper mix of both components - and is very important. When you get to the end of the tube, and the mixing tube starts spouting bubbles - stop there and discard the tube. I've had a few instances where the product hasn't mixed correctly, and the epoxy stays sticky and doesn't harden. You can use a putty knife or rag to scrape off as much of this material as possible, and then finish cleanup with a solvent. The product guide recommends "Sika Equipment Cleaner" to clean up unmixed or uncured epoxy.  This product contains Xylene according to the MSDS, and so does the brake cleaner that I had in my garage, so I've cleaned some of this unmixed epoxy with a small amount of brake cleaner. (Try getting some "Sika Equipment Cleaner" on a Sunday morning....)

Unmixed epoxy cleaned up with Brake Cleaner, ready for re-application of mixed Crack Fix
Another issue that I ran into is that the Crack Fix is so watery when applied, it flows with any slight slope in the concrete slab. I have a few cracks that extend to a floor sump, with a slight grade. The crack fix kept on flowing along the crack, and leaving a trough in the crack, and puddling out of the crack at the bottom of the slope. The solution to this is to shoot some Crack Fix into a small plastic container, and let it set for 2 to 3 hours. Once the product starts setting up, and not flowing, apply it to the crack with a putty knife. It should stay in the crack without flowing down. Check and retrowel with the putty knife after 30 minutes.

Crack Fix setting up in a plastic cap, almost ready to apply.
Finally, in preparation for painting, I've found that a belt sander is really the best way to level out cracks. I had always managed to get by without a belt sander until now. I went out, purchased an inexpensive Skil 3 x 18 sander, and a few belts of 80 grit. This machine works great for levelling out the cracks and getting a nice flat surface equal with the concrete prior to painting. 

Skil 7510-01 3 x 18" belt sander, with vacuum attached. Perfect for levelling epoxy Crack Fix.
The sander accepts a 1 1/2" shop vac hose for dust collection, which also helps remove heat from the motor during operation. I highly recommend operating this tool with a vacuum attached. It's really efficient at levelling out cracks.

Epoxy filled cracks levelled with the belt sander, ready for painting. 
This has been a good job to get done - so far, I've used about a dozen tubes of Crack Fix. It's not inexpensive, but compared to bringing in a conctractor to replace your basement floor slab, this is an excellent way to prolong the life of your basement floor.

Getting near the end of the job. Perimeter of the floor - painting completed. Now filling all the cracks in the center of the floor, almost ready to complete the painting. 


Share:

Upgrading Basement Insulation - Finishing the Job and Insulating the Garage Stairwell

If you've been following the past several posts - I've been upgrading the basement insulation in my 25 year old home, working on improving energy efficiency and indoor air quality. Following the installation of polyurethane spray foam in most of my basement walls with a spray foam contractor, I had half of a Touch-n-Foam 600 spray foam kit left to use up. We were in the process of re-closing all the basement walls - installing the drywall and getting the drywall joints taped and finished. I realised that I had not done anything with a stairwell in the back corner of my home - which runs from the heated utility space underneath my garage elevated slab floor and the garage. So I decided to attack that final section of the foundation wall - pull off all the drywall and use up the rest of the Touch-N-Foam kit.

Garage Stairwell - Drywall and 1.5" partial coverage of styrofoam removed
First step was to remove the drywall. The drywall had been installed before the stairs were installed - so the drywall was cut just above the framing of the stairwell. The drywall was removed to just below the level of the rim joist on top of the concrete foundation wall. There was a layer of foam sheet installed on the top of the foundation wall below the rim joist - no other sealing.

Rim joist. The styrofoam you can see here has been cast into the foundation wall - intended as a slot for pouring the elevated slab. Since the slab doesn't extend to this corner because of the opening for the stairwell, the builders left it in place. I decided to leave it in place as well, since it was cast in the foundation wall - and apply spray foam directly overtop. 
With the drywall removed, it was time to get started with the Touch-N-Foam kit. One of my lessons learned from the previous application was to get my hands on a 3M full face organic vapour cartridge respirator - which I did. I purchased the medium size - I have a pretty large head - and was able to get an effective face seal and performance.

3M Full Face respirator. 
On to the foam application. I started with foaming the corners, rim joist space, and the bottom wall cavities. 

Start applying foam on all corners, rim joist, bottom wall gaps. 
Once the perimeters were foamed - then I got onto the wall spaces. This time - I didn't have time to try to heat the concrete wall before the application of the Touch-N-Foam - I guess that my wall temperature was about 8 degrees Celcius (46 F) - below the recommended 16 C (70 F) minimum surface temperature recommended by Touch-N-Foam. What I found was that as the foam cured, it contracted slightly and pulled away from the wall studs. You can see the 1" wide gap in the photo below:

Note the gap next to the two studs - the foam contracted due to the low surface temperature of the concrete wall.
In my case this wasn't catastrophic - I justed gave the foam 30 minutes to cure, and then came back and foamed the gaps where they appeared, but it was interesting to see the effect of applying this product on a substrate that was below the manufacturers recommended application temperature.

Underneath the stairs - there was no insulation at all in this portion of the wall:

No insulation in this portion of the wall underneath the drywall.
So - this space was foamed as well.

In my other post about using the Touch-N-Foam kit - I wrote about what happens when you reach the end of the cylinder - and the resulting uncured foam and the requirement to physically remove it to prevent odours within the house. This time - I was much more vigilent when I was getting to the bottom of the cylinders - as soon as I noticed a change in the consistency of the applied foam - I immediately stopped applying the foam and checked the cylinders. A test shot into a garbage can confirmed that I had run out of the Part A chemical - and that it was time to stop applying foam. The photo below shows about 6 cubic inches of foam at the end of the application that did not have sufficient Part A in the mix. 

The end of the application of the Touch-N-Foam - some runny foam which only has Part B, and no Part A. 
This small amount of uncured foam was easy to remove with a putty knife, and I finished up the application with some single part foam from a spray can.

Re-applying the drywall over the foam installation. 
And, again, as desribed in the previous post - it is extremely important to cover all the spray foam with drywall to give you the fire resistance.

All in all - I am satisfied with the performance of the Touch-N-Foam kits - they are better suited for small to medium sized insulation jobs - such as a portion of a wall or a specific sealing job. Larger jobs - consider going with a spray foam contractor - which will be more cost effective and quicker. 
Share: