Atwood Landing Gear Repair

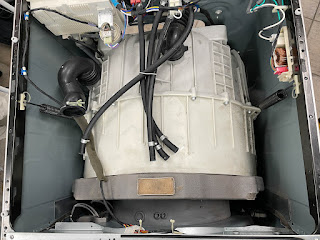
I purchased a 20 year old Glendale Titanium 5th wheel last year - which hadn't received regular maintenance from what I could tell from various issues I've had with the unit. One issue was noisy operation of the landing gear, and vibration in the landing gear mechanism. Visual inspection of the landing gear mechanism in operation from the basement door showed the gearbox rotating back and forth about an inch on each revolution of the driveshaft, this clearly wasn't normal, plus I had broken tabs on the plastic gearbox case which allowed the gearbox to move excessively. I decided to make some repairs and try to resolve the noise and make the landing gear more reliable. 

The first step was supporting the front of the fifth wheel. My truck has an 8' box and I've only got about 12" of clearance between the back of the box and the front of the basement when the truck is hooked up. I decided to crib up the front of the unit so I could take my time with the repair, and have good access to the basement to completely remove the landing gear. 

Supporting the front with 4x4" cribbing

Once I got the front of the unit supported on the cribbing - with the cribbing directly supporting the frame, I tested the stability before removing the landing gear. It wasn't quite as solid as I expected, so I installed some cross bracing and that removed any side to side movement on the cribbing. Two 2x4" did the trick nicely. 

Cross bracing makes the cribbing much more stable. 

With the front now supported by the cribbing - removal of the landing gear is quite simple. Remove the leg extensions by undoing the pins and pulling them off the landing gear lower section, and then raise the lower sections completely to facilitate disassembly of the landing gear from the trailer frame. 

Landing gear legs removed through the basement hatch.

The landing gear is held to the frame by two c shaped brackets with bolt clamps. Simple to remove once the crossbar has been disassembled. 

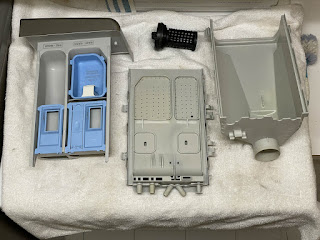
With the landing gear removed, disassembly is very straightforward. Belco, my local RV parts supply, had an aftermarket aluminum frame replacement gearbox at a reasonable price, about $100. 

Aftermarket aluminum frame gearbox, dimensionally accurate.

Swapping the gearbox is very simple - several long machine screws hold the motor to the gearbox. It's a straight swap. 

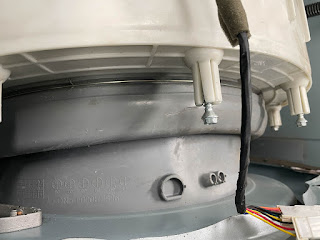
Broken tab on plastic bodied OEM gearbox

This is where I found the main shaft between the gearbox and the driven leg bevel gear was bent. 

Thrust bearing, non-driven bevel gear shaft, and driven leg bevel gear shaft (bent)

The gearbox came with a new bevel gear shaft, so that would take care of the rotation of the motor and gearbox on the driven landing gear leg. Close inspection of the short bevel gear shaft showed some damage to the shaft - a vertical crack in the shaft caused by the leg being driven to full stop under power. It would be a matter of time before this shaft fails. 

Note the crack in the shaft running from the lower pin hole

When I compared the two shafts, I noticed my longer bent shaft didn't have any cracks, and could be shortened to replace my shorter cracked shaft. 


Hole drilled out in bent shaft, and marked to cut to length of the shorter shaft. 

Drilling out the shaft with a drill press. 

I also purchased a new set of bevel gears, which comes with new roll pins. 

Disassembling, greasing, and replacing the acme screw. This is a messy job.


Bevel gear disassembly - short shaft, roll pins, bevel gears, thrust bearing, thrust washer

Acme screw regreasing.

I don't have a lot of photos from this part of the operations - my hands were covered in high pressure grease - difficult to operate the camera with greasy hands and I wanted to get this part of the job done fairly quickly. Re-assembly was straightforward, as was replacement in the RV. 

Once the landing gear was replaced in the RV, I resealed the openings around the landing gear legs with black silicone caulking. Black duct tape was used as a mould for the silicone, to help it set in place and keep the sealant tidy. 

Black silicone sealant around the landing legs when reinstalled.

Let me know if you have any questions - the whole job took a Saturday with all the parts in hand. 


Share:

Front Load Clothes Washer Performance compared to old Top Load Machine

Recently I picked up a used LG front load clothes washer at a good price that needed some repairs. You can read about that here. Once I got the machine spinning well without excessive vibration, I decided to run a comparison test of clothes spinning performance. I loaded up a laundry bag with a typical wash for me - two pairs of pants, cycling clothes, underwear and t-shirts. I did a wash with the old machine, and weighed the clothes dry at the start and wet following the final rinse and spin cycle. I then did the same for the new machine. 

The new LG Washing machine and dryer

The old Kenmore top load washing machine

Weighing the laundry using a digital fish scale


                                Dry Weight (kg) Spun Weight (kg) Water Weight (kg)
Top Load Machine                 4.5 kg                     7.4 kg                 2.9 kg
Front Load Machine         4.4 kg                     5.1 kg                 0.7 kg
Difference                                                                         2.2 kg

The difference in performance of the front loading machine spin is vastly superior - 0.7 kg of water left in the load, versus 2.9 kg for the top loading machine. Drying time went down from 59 minutes to 28 minutes. I'll be saving a lot of electricity - we do about 10 loads of laundry a week with the kids. I should be able to see the effect on my utility bills. Will report back in a year. 

Share:

Diagnosing Front Load Clothes Washer Vibration and Replacing Shock Absorbers

I picked up a used front loading washing machine a few weeks ago, and set about to see if I could get it to function properly without vibration. The previous owner indicated that the washing machine jumped around when in the spin cycle, and that the drum spider arm assembly had been recently replaced.

When I got the machine home, I removed the top cover and did a quick inspection. One issue popped out immediately - a detached drum weight which was resting on the door seal. 

Drum weight missing - should be installed on the four posts with screws


Drum weight reinstalled correctly, Soap Dispensor Removed for Access

I removed the entire soap dispensor assembly to give it a good cleaning, it had some black mould growing in the top and rails of the sliding soap tray. With the soap dispensor removed, I had good access to replace the drum weight and access all the fasteners correctly. I also needed to reinstall the door seal clamping wire correctly, it wasn't in place all the way around the door seal. 

Scrubbing clean the soap trays, receiver and cover

With the weight replaced, and the soap trays replaced, I ran some tests to check the level of vibration. I found that the machine was hopping when spinning up and spinning down at a particular frequency, a resonance issue. So the next step would be to replace the shock absorbers underneath the drum.

Dryer front removed for replacement of shock absorbers

While replacing the shock absorbers, I took the time to clean out the pump filter, and dust underneath the drum. 

It was then time to install the washing machine in the laundry room. I purchased a new set of 90 degree washer hoses so that I'd be able to get the machine nice and close to the wall. I zip-tied the drain hose to the drain pipe so that there was no way the drain hose could fall out of the pipe. 

Installing the washer. Magvent to the right. Dryer outlet moved up on the wall. Zip ties retaining drain hose. Insteon controller on the washer plug.

With the new shock absorbers I've solved the vibration problem, and the machine runs reliably now. Excellent upgrade for the laundry room. 


Share:

Laundry Room Reconfiguration and Magvent Installation

Our 30 year old house has a compact but functional laundry room, set up for top loading machines with the dryer on the left and the washing machine on the right. When upgrading to front loading machines, we learned that the front loader doors open to the left. If the machine is placed on the right of the dryer, the door will be in the way when transferring clothes. So - job number one will be to switch the washer and dryer placement. 

The completed installation - Washing machine on the left, dryer on the right

The second issue to be resolved is the location of the dryer vent outlet, the location of the dryer outlet plug, and the ability to get the machines close to the wall. In the current installation, the dryer vent outlet is on the side wall, and the dryer outlet plug is right at baseboard level - which causes the dryer vent and dryer power cable to interfere. This means I can only get the dryer about 5 inches from the wall, and I need a large loop of flexible duct to be able to make the connections with the machine pulled out from the wall before pushing them into place. 

Current installation - side vent outlet and power plug right at floor level

Current installation - Dryer vent interferes with power plug

With the power plug at floor level, it is very difficult to make connections with both machines in the laundry room at the same time. Installation gymnastics include climbing over the machines to get to the space behind the dryer to make or break connections to get the maching into place or removed. So another aspect of the project will be moving the dryer plug up on the wall and converted the current plug outlet box into a junction box. 

To move the dryer installation to the other side, I ran into an interference with the copper water piping running through the floor plate of the wall to the faucets for the washer. With limited access below the floor due to the placement of the furnace, I wasn't able to move the copper piping to be able to center the new dryer vent placement. I also wanted to get rid of the long flexible duct behind the dryer - and when researching this problem online, I found the Magvent dryer vent magnetic coupler. The Magvent comes with two magnetic elements - the outlet, with a magnetic ring and adapter for 4" round duct, and the part that goes on the back of the dryer - a short length of flexible duct with a second magnetic ring. 

Magvent flexible coupler - installs on dryer outlet


Magvent flexible coupler installed and compressed on the dryer

My installation options for the installation of the Magvent were quite limited, with the copper water pipe blocking a perfect centered location for the magvent. I had to offset the Magvent to one side, partially remove a 2x6 wall stud to give space for the duct coupler, and drill a 4 1/2" hole through the floorplate to route the duct through the basement to the rest of the extraction ductwork. 

Before closing the drywall, I created a drywall box within the wall so that the magvent opening would be sealed by drywall all around, to create a fire break and prevent dryer lint accumulation within the wall space. 

Magvent duct installed in-wall, with duct running down through floor plate

The arrangement worked quite well - with the dryer backed into the wall on the right side of the laundry room, the strong magnets in the Magvent made the connection with no issues, and I didn't have to hand upside down over the dryer connecting any 4" round worm clamps. 

Moving the dryer into position to couple the Magvent

With the dryer outlet moved up the wall - this also avoided any connection gymnastics, easy to reach over the dryer to connect and disconnect the dryer. 

Dryer plug moved up the wall, dryer vent moved from left to right

I've very happy with the completed installation, doors open in the correct way for easy transfer of laundry, and I've managed to get rid of a large loop of flexible duct behind the dryer for greater efficiency. I bought the Magvent at Lee Valley Tools online. 

Washing machine on the left, dryer on the right

I have a few other articles on this project:

1. Repairing and replacing the shock absorbers and drum weights on a front loading washer
4. Comparing the efficiency of an old top-load washer with a new front load washer. 

Feel free to ask any questions in the comments section below. 


Share: