Showing posts with label Renovations. Show all posts

Laundry Room Reconfiguration and Magvent Installation

Our 30 year old house has a compact but functional laundry room, set up for top loading machines with the dryer on the left and the washing machine on the right. When upgrading to front loading machines, we learned that the front loader doors open to the left. If the machine is placed on the right of the dryer, the door will be in the way when transferring clothes. So - job number one will be to switch the washer and dryer placement. 

The completed installation - Washing machine on the left, dryer on the right

The second issue to be resolved is the location of the dryer vent outlet, the location of the dryer outlet plug, and the ability to get the machines close to the wall. In the current installation, the dryer vent outlet is on the side wall, and the dryer outlet plug is right at baseboard level - which causes the dryer vent and dryer power cable to interfere. This means I can only get the dryer about 5 inches from the wall, and I need a large loop of flexible duct to be able to make the connections with the machine pulled out from the wall before pushing them into place. 

Current installation - side vent outlet and power plug right at floor level

Current installation - Dryer vent interferes with power plug

With the power plug at floor level, it is very difficult to make connections with both machines in the laundry room at the same time. Installation gymnastics include climbing over the machines to get to the space behind the dryer to make or break connections to get the maching into place or removed. So another aspect of the project will be moving the dryer plug up on the wall and converted the current plug outlet box into a junction box. 

To move the dryer installation to the other side, I ran into an interference with the copper water piping running through the floor plate of the wall to the faucets for the washer. With limited access below the floor due to the placement of the furnace, I wasn't able to move the copper piping to be able to center the new dryer vent placement. I also wanted to get rid of the long flexible duct behind the dryer - and when researching this problem online, I found the Magvent dryer vent magnetic coupler. The Magvent comes with two magnetic elements - the outlet, with a magnetic ring and adapter for 4" round duct, and the part that goes on the back of the dryer - a short length of flexible duct with a second magnetic ring. 

Magvent flexible coupler - installs on dryer outlet


Magvent flexible coupler installed and compressed on the dryer

My installation options for the installation of the Magvent were quite limited, with the copper water pipe blocking a perfect centered location for the magvent. I had to offset the Magvent to one side, partially remove a 2x6 wall stud to give space for the duct coupler, and drill a 4 1/2" hole through the floorplate to route the duct through the basement to the rest of the extraction ductwork. 

Before closing the drywall, I created a drywall box within the wall so that the magvent opening would be sealed by drywall all around, to create a fire break and prevent dryer lint accumulation within the wall space. 

Magvent duct installed in-wall, with duct running down through floor plate

The arrangement worked quite well - with the dryer backed into the wall on the right side of the laundry room, the strong magnets in the Magvent made the connection with no issues, and I didn't have to hand upside down over the dryer connecting any 4" round worm clamps. 

Moving the dryer into position to couple the Magvent

With the dryer outlet moved up the wall - this also avoided any connection gymnastics, easy to reach over the dryer to connect and disconnect the dryer. 

Dryer plug moved up the wall, dryer vent moved from left to right

I've very happy with the completed installation, doors open in the correct way for easy transfer of laundry, and I've managed to get rid of a large loop of flexible duct behind the dryer for greater efficiency. I bought the Magvent at Lee Valley Tools online. 

Washing machine on the left, dryer on the right

I have a few other articles on this project:

1. Repairing and replacing the shock absorbers and drum weights on a front loading washer
4. Comparing the efficiency of an old top-load washer with a new front load washer. 

Feel free to ask any questions in the comments section below. 


Share:

Patio Pergola Project - Outdoor Grade Ceramic Tile Installation

The next step in the Patio Project was to select an attractive and durable concrete finish so that the two concrete surfaces - old and new - appear consistent and neat. The challenge was to come up with a ceramic tile product and installation system that could withstand freezing temperatures in the winter.
Completed Ceramic Tile Installation
See my other posts regarding the concrete patio works - enlarging and squaring off the patio with a 6" thick concrete extension and additional ground support, and the selection and installation of an aluminum framed pergola structure with retractable vinyl awning.

Alternatives Considered

  • Epoxy paint
  • Teak wood slats applied to the surface
  • Recycled plastic / synthetic planks or tiles applied to the surface
  • Ceramic tile
  • Interlocking brick
The key constraint was the lack of height between the top surface of the concrete and the door threshold entering the house. I wanted to maintain a height difference so that water during spring melt could not back up and flow into the house through the door. This effectively eliminated all the options except for epoxy paint and ceramic tile. 

My other issue was the lack of surface finish consistency of the concrete between the old and new surfaces. The old concrete had been poured on a compacted earthen berm which was subsequently excavated. The top surface was not particularly well finished or flat. The existing epoxy paint provided a consistent color, but the surface finish was slick, slippery when wet and not particularly appealing. 

So - we settled on ceramic tile as the selected finish. Next steps were to consider the type of tile and the tile installation system. Our climate is northern, with lows in the winter of -40F/C and considerable snow. The ceramic tile and installation system would need to be able to withstand freeze and thaw, and a temperature range from -40 to +40C for thermal expansion. 

Surface Preparation

There were two principal concerns for surface preparation prior to ceramic tile installation. Removal of the old epoxy paint from the 25 year old concrete, waiting time for proper curing of the new concrete extension, and sealing the interface between the old and new concrete so that there wouldn't be movement between the old and new concrete which might lead to cracking of the ceramic tile. 

First - I bonded and sealed the crack between the two concrete slabs using Sika crack fix. I got underneath the patio and sealed the bottom of the crack using adhesive tape, to help retain the Sika crack fix epoxy and manage the amount of material I would require. I then filled the crack in stages until I had pooling of epoxy on the surface. 

Note the interface between old and new concrete - sealed with Sika Crack Fix. 
 Next step was to level the concrete surface, and remove as much of the old epoxy paint as possible. My local rental center had a scarifying wheel attachment for a floor polisher which I tried and was very effective. The wheel has angled diamond cutters around the perimeter of the wheel which were effective at removing not only the paint, but the high surfaces of the concrete.
Diamond blade of the scarifying wheel.

Paint removal in process

Detail of the joint between the old and new concrete. Grouted with Granirapid.
Surface prep was completed in a weekend. 

Ceramic Tile Selection

We needed to consider a tile which would not absorb any water. This led us to a porcelain tile, rated for outdoor installation. We also sought tiles with a rough surface which would be less slippery when wet - to avoid falls with kids coming into the house out of the pool or in wet weather. It took some time but we finally settled on a tile from Italbec:

Italbec Basalt Gray Ceramic Tile Samples
Next task was to select the ceramic tile installation. I got into touch with Mapeii - they have a technical department which will advise on installation systems and applications. They were super helpful, and we settled on the Granirapid installation system. The Granirapid system is a modified polymer flexible grout system which dries rapidly and minimizes entrained water underneath the tiles - this has the advantages of reducing the possibility of efflorescence (white stains) and cracking or delamination from freeze and thaw movement. We added a shear barrier - Mapeguard - which helps to prevent cracking due to temperature changes between the ceramic tile on surface and the concrete structure below. In addition - we added flexible expansion joint strips every 10 feet to help manage thermal expansion.

Mapeguard Shear Barrier - Green Material. Ceramic tile installed overtop using the Granirapid mortar system. 

Tile Trim and Joint Profiles

In my research I found a Schlutter balcony edge profile which looked like it would eliminate the requirement to bond ceramic tile on the vertical edges of the concrete slab. I went ahead with these profiles - they are available in a range of heights and colors. I selected a 6" high profile (the tallest available) in metallic gray color. My ceramic tile installer had never worked with balcony edge profiles before, but it turned out well and in the end, he thinks it saved him considerable time and aggravation. 

Schlutter Balcony Edge Profile
An interesting feature of the profile is that by design, it allows water to escape from the tile system and drip down behind the profile - preventing a buildup of water which could lead to freeze cracks. The profile is easy to apply, using the tile mortar, and has corner profiles for a neat final appearance.
Schlutter Balcony Edge Corner Profile detail

Expansion joint profile running laterally in the photo

Conclusion

The Patio has been through 2 winters now, with absolutely no issues - no lifted tiles, no cracking or other damage. So far so good. To reduce the risk of problems, I try to keep snow accumulation to a minimum in the winter, so I don't end up with a glacier come spring time which might allow water to accumulate and penetrate the grout causing problems. 

The completed tile surface

Tile surface on the steps

Sources and Links

My local sources for the ceramic tile was Italbec in Montreal. All the Mapei installation products were sources from Ciot in Brossard. All of the metal profiles were sourced from Marty's Carpet and Flooring in New York state, who managed to get the 6" balcony profiles in a matter of days from Schlutter's distribution center in upstate New York. Thanks to all the suppliers - they were all great. 


Share:

Patio Pergola Project - Selecting the Type of Shade Structure - Palmiye Silver Pergola

This step of the process took time - about two years. What type of structure to erect on the newly finished elevated concrete patio? We wanted something that would allow us to control insects, protect us from the sun on hot days, protect us from the rain when barbequeing on wet days, and look good at all times.

The completed Palmiye Pergola Installation
We considered the following major concepts:
  • 4 season sunroom;
  • 3 season sunroom or screened porch;
  • Prefabricated gazebo;
  • Classic wooden structure pergola, with some rain protection awning;
  • Tubular structure awning with removable insect panels;
  • Metal structure pergola with retractable awning. 
Ultimately, we decided to go with the last option. We found a North American distributor for the Palmiye pergolas with retractable awnings, and thought that this would be the best fit for our needs. 


I took care of the measurements and marking up the manufacturer drawings - these are custom manufactured for particular applications and I was able to adjust the dimensions to fit our Patio perfectly. 

From order to delivery took about 6 months - these are fabricated in Turkey and were shipped by sea container to North America. Nick from Retractable Covering Solutions in Brantford, Ontario supplied the Pergola and performed in the installation. I wasn't able to find anything of similar quality fabricated in North America - if you're aware of anything - feel free to let me know in the comments. 

Unfortunately, installation had to take place in December. 
Installation took place in December, in freezing conditions, however it was relatively simple to install. Installation took three days - two days for erection, and then another day for installation of the awning motor which was delayed, and final adjustment of the awning.
Structure complete and awning installed

Structure complete and awning installed

Structure complete and awning installed

Note the steel roof sheeting which protects the vinyl awning when retracted. 
Once the Somfy awning motor was installed, and the awning could be extended and retracted, the installation was complete and functional. One nice feature of the awning is integrated LED lighting, with the electrical wiring hidden within the structure of the awning.

Note the LED light fixtures on the awning crossbars.

Heres the effect with the LED fixtures illuminated.

Conclusion

The awning is rugged and functional, and does not need to be retracted even in heavy rain or wind. The water flows down the awning, and the front metal crossbar has an inverted U water collection channel, and water is diverted to the vertical structural members which are hollow and act as downpipes for water coming off the awning.

Water runs down the structural columns and out these spigots. 

Sources and Links

Palmiye was the fabricator of the pergola and awning system. Retractable covering solutions imported the awning and installed it.


Share:

Patio Pergola Project - Extend an Elevated Concrete Deck

Problem - how do you extend an elevated concrete deck? Ours was not square, and had a huge notch in one corner. And - the steps were settling into the earth because they were installed without foundations below the frost line.

One of the most extensive projects we undertook at the house has been a patio refurbishment. The back patio off our family room is an elevated concrete slab with concrete sonotube columns supporting it from below the frost line. A very rugged structure that does not appear to have moved since construction of the house from 25 years ago.
Demolition of steps underway

Also - very unattractive. Epoxy paint peeling. Massive 20' long concrete step was constructed on grade, and was settling / heaving with the frost. The shape was not rectangular, it had a large 45 degree corner cut from the shape which precluded the erection of a shade structure. And - it was not square to the house - it was square to the yard and pool.

Elevated Concrete Patio - Steps settling into the ground, shape not rectangular, corner cut at 45 degrees
After much thought, we decided to keep the elevated concrete patio, but demolish the steps, square off the rectangular shape and make it a bit wider, and install a smaller set of concrete steps with foundations below the frost line. 
Demolition of Steps Underway

Demolition Complete
With demolition underway, design of the concrete extension begun. I had engaged a concrete contractor to perform the work. They offered to perform the extension, but would not engage to produce any drawings or sketches. This posed a problem for building permits. I discussed the situation with our municipal planning department - they advised me that if I ever planned to construct a permanent structure on the patio, such as a sunroom or extension, they would require a structural design stamped by a professional engineer. So - I sought and found a civil / structural engineer that would prepare the extension plans - and I'm glad that I did. He recommended changing the extension thickness from 4" to 6", adding some additional screw piling suppports, and some additional rebar from what the concrete contractor proposed. Work then continued with the screw pile installation, selected to eliminate the requirement for large excavations to perform sonotubes and footings below the frost line.

Screw pile installation.
The pile is literally screwed into the ground by the
hydraulic drive head installed on a mini-excavator. 

Completed screw pile, which will support the squared corner of the patio. Note the special head designed for supporting pour in place concrete.
With screw piles installed, formwork and rebar began.

Formwork completed, ready for Rebar

Formwork detail for steps
Rebar installed, note top plate of screw pile in foreground

Rebar epoxied into existing concrete for shear protection
With formwork and rebar completed, the concrete was supplied by a mini-mix truck and left to cure for 15 days before removal of formwork. It was important to keep the concrete moist during the period so that it had sufficient water to support a strong cure. 

Fresh concrete

Fresh concrete steps

Finished, cured concrete

Conclusion

So - project virtually complete and ready for the shade structure. Just one step remained and that was to seal the joint between the old and new concrete with epoxy crack fill - to ensure water would not be able to penetrate the joint, freeze, and separate the concrete. More posts to follow on the Pergola and the ceramic tile installation.

Sources and Links

Cimentech was the concrete contractor. They did good work and I'm satisfied with the results. Vistech performed the screw pile installation per the engineers recommendations - and I'm quite happy with their work as well - arrived when expected and performed the work very well. Michel Kim was the civil engineer that prepared the structural drawing and documents for the building permit. He was a very practical engineer, and I think he was a big factor in improving the quality of the project. 


Share:

Basement Concrete Floor Paint - Single Part Epoxy Paint

Our 25 year old house has (had) a concrete floor in the basement utility room that was a bit more than rough. A spiderweb of hairline cracks, and some surface abrasion / weakness caused by lack of maintenance and efflorescence in certain places. It looked like the concrete had been painted at one time, but it was very difficult to tell.

The completed floor paint job.

Concrete prepared for painting - all cracks filled with Sika Epoxy Crack Fill
With the basement insulation project, where all the perimeter walls had to be cleared so that the drywall could be removed, and spray polyurethane foam insulation applied - it was the perfect time to paint the perimeter of the concrete floor. Prior to paint, I repaired all the floor cracks with Sika Crack Fix - from hairline cracks to the largest cracks which measured approximately 4mm wide at their widest. 15 tubes of Sika Crack Fix - $300 worth of epoxy - and all the cracks were filled and the floor ready to paint.

Cracks repaired that run into floor sump
For a concrete floor paint job, I highly recommend that you have a belt sander - it's perfect for smoothing out any surface roughness, high spots on epoxy crack fill, and buffing out any surface imprefections due to efflorescence. Since I just need a belt sander for this project, I bought an inexpensive Skil 3 x 18" belt sander - the 6A 7510 with pressure control. It's a nice tool, and was perfect for this job.

For paint - I decided to go with a simple single part epoxy. I did not want to get into two part epoxies requiring mixing of part A and part B - since I wouldn't have any heavy loads or vehicles on the floor. I also wanted a brand name product with a good reputation, commonly available at local building stores - so that I could restock easily, and hopefully procure the same product for touchups every couple of years.

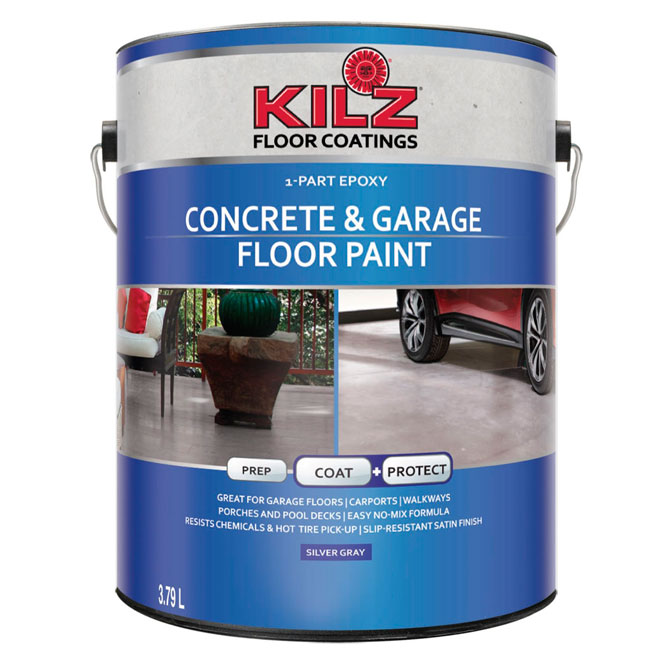
I settled on the Kilz single part epoxy concrete floor paint - reasonably priced and with good online reviews, from a good manufacturer.


Kilz Concrete and Garage Floor Paint
I had several spots with efflorescence - a white crystalline staining in several spots on the floor - particularly around 3 or 4 concrete columns supporting the garage elevated slab. I chose to simply wash the efflorescence with the concrete wash product recommended by the paint instructions - KILZ Concrete & Masonry Cleaner & Degreaser.

Following the first coat of paint, I found that any places I had raised epoxy repairs, and I hadn't sanded the epoxy - I didn't get a particularly good bond of the paint to the epoxy. So for some spots, I went back and sanded down the epoxy crack fills with the belt sander, which also roughened the epoxy and improved adhesion of the paint.

Sanding down Epoxy crack repairs flush with the concrete
I also found that where I had heavy efflorescence stains, and I only cleaned with the KILZ Concrete & Masonry Cleaner & Degreaser, the paint puffed up as it dried, and gave very poor adhesion. So it was clear - I had to do a better job dealing with the efflorescence prior to painting.

Halo of efflorescence around concrete column - led to poor adhesion.
At the spots where I had poor adhesion - I used the belt sander to take the paint back down to the concrete, and physically remove any efflorescence from the surface. Then I used the recommended concrete etching product - KILZ Concrete & Masonry Cleaner & Etcher. This product was aggressive on the efflorescence, and soaked into the porous surface of the concrete - bubbling and hissing whereever it encountered the efflorescence. I then cleaned with rinse water, and let dry for 24 hours. When I went back to inspect the concrete - the concrete was perfectly clean, dry and natural coloured, except in a few spots where there was some new white efflorescence on the surface of the concrete - much less than before. So at these spots - I did a second treatment with the KILZ Concrete & Masonry Cleaner & Etcher, and waited another 24 hours. Following the second treatment, I had no further efflorescence on the surface of the concrete.

Efflorscence repair - sand down the paint, remove the efflorescence with Concrete Etch, and repair weak surfaces with a thin layer of Sika Epoxy Crack Fix
So - I then applied a second coat of paint - and so far - it seems to have beat the efflorescence, no puffiness or lack of adhesion in the paint, and better bonding of the paint to the epoxy crack fix.

Finally - I had spots of the concrete floor where there were small sections - up to a foot long by 6 inches wide - where the surface of the concrete had started crumbling slightly, leaving a rough surface. At these spots, I used Sika Crack Fix applied across the surface, spread out with a putty knife, and sanded flat with the belt sander once cured. This protected the concrete surface, and gave a nice smooth surface for the paint to adhere to.

Rough surface repair with Sika Epoxy Crack Fix - levels chips 
The final product look much much cleaner, and neat. A huge improvement. A bit of an investment in time and effort, but I think it should pay off when it comes time to sell the house.

Final floor repair


Share: