Our 25 year old house has (had) a concrete floor in the basement utility room that was a bit more than rough. A spiderweb of hairline cracks, and some surface abrasion / weakness caused by lack of maintenance and efflorescence in certain places. It looked like the concrete had been painted at one time, but it was very difficult to tell.
 |
| The completed floor paint job. |
 |
| Concrete prepared for painting - all cracks filled with Sika Epoxy Crack Fill |
With the
basement insulation project, where all the perimeter walls had to be cleared so that the drywall could be removed, and spray polyurethane foam insulation applied - it was the perfect time to paint the perimeter of the concrete floor. Prior to paint, I
repaired all the floor cracks with Sika Crack Fix - from hairline cracks to the largest cracks which measured approximately 4mm wide at their widest. 15 tubes of Sika Crack Fix - $300 worth of epoxy - and all the cracks were filled and the floor ready to paint.
 |
| Cracks repaired that run into floor sump |
For a concrete floor paint job, I highly recommend that you have a belt sander - it's perfect for smoothing out any surface roughness, high spots on epoxy crack fill, and buffing out any surface imprefections due to efflorescence. Since I just need a belt sander for this project, I bought an inexpensive Skil 3 x 18" belt sander - the 6A 7510 with pressure control. It's a nice tool, and was perfect for this job.
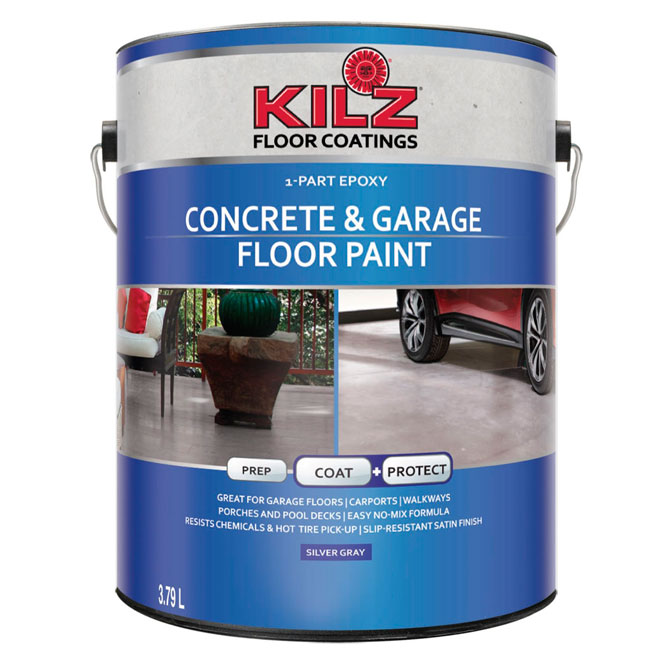
For paint - I decided to go with a simple single part epoxy. I did not want to get into two part epoxies requiring mixing of part A and part B - since I wouldn't have any heavy loads or vehicles on the floor. I also wanted a brand name product with a good reputation, commonly available at local building stores - so that I could restock easily, and hopefully procure the same product for touchups every couple of years.
I settled on the Kilz single part epoxy concrete floor paint - reasonably priced and with good online reviews, from a good manufacturer.
 |
| Kilz Concrete and Garage Floor Paint |
I had several spots with efflorescence - a white crystalline staining in several spots on the floor - particularly around 3 or 4 concrete columns supporting the garage elevated slab. I chose to simply wash the efflorescence with the concrete wash product recommended by the paint instructions - KILZ Concrete & Masonry Cleaner & Degreaser.
Following the first coat of paint, I found that any places I had raised epoxy repairs, and I hadn't sanded the epoxy - I didn't get a particularly good bond of the paint to the epoxy. So for some spots, I went back and sanded down the epoxy crack fills with the belt sander, which also roughened the epoxy and improved adhesion of the paint.
 |
| Sanding down Epoxy crack repairs flush with the concrete |
I also found that where I had heavy efflorescence stains, and I only cleaned with the KILZ Concrete & Masonry Cleaner & Degreaser, the paint puffed up as it dried, and gave very poor adhesion. So it was clear - I had to do a better job dealing with the efflorescence prior to painting.
 |
| Halo of efflorescence around concrete column - led to poor adhesion. |
At the spots where I had poor adhesion - I used the belt sander to take the paint back down to the concrete, and physically remove any efflorescence from the surface. Then I used the recommended concrete etching product - KILZ Concrete & Masonry Cleaner & Etcher. This product was aggressive on the efflorescence, and soaked into the porous surface of the concrete - bubbling and hissing whereever it encountered the efflorescence. I then cleaned with rinse water, and let dry for 24 hours. When I went back to inspect the concrete - the concrete was perfectly clean, dry and natural coloured, except in a few spots where there was some new white efflorescence on the surface of the concrete - much less than before. So at these spots - I did a second treatment with the KILZ Concrete & Masonry Cleaner & Etcher, and waited another 24 hours. Following the second treatment, I had no further efflorescence on the surface of the concrete.
 |
| Efflorscence repair - sand down the paint, remove the efflorescence with Concrete Etch, and repair weak surfaces with a thin layer of Sika Epoxy Crack Fix |
So - I then applied a second coat of paint - and so far - it seems to have beat the efflorescence, no puffiness or lack of adhesion in the paint, and better bonding of the paint to the epoxy crack fix.
Finally - I had spots of the concrete floor where there were small sections - up to a foot long by 6 inches wide - where the surface of the concrete had started crumbling slightly, leaving a rough surface. At these spots, I used Sika Crack Fix applied across the surface, spread out with a putty knife, and sanded flat with the belt sander once cured. This protected the concrete surface, and gave a nice smooth surface for the paint to adhere to.
 |
| Rough surface repair with Sika Epoxy Crack Fix - levels chips |
The final product look much much cleaner, and neat. A huge improvement. A bit of an investment in time and effort, but I think it should pay off when it comes time to sell the house.
 |
| Final floor repair |


