Quickjack Hydraulic Fluid Contamination and Quickconnect Fitting Failures

I had the BMW wagon in the garage up on the quickjack for a few weeks at the start of September, fixing a Low Boost Pressure code, oil pan leak, replacing rear drive axles, and treating some underbody and rear bumper corrosion

I've had the Quickjacks for two years now - they've been a great tool, really useful to quickly get all four wheels in the air for doing seasonal tire changes, or drivetrain maintenance. Halfway through the last job, the hydraulic hoses began to get difficult to reconnect, there was residual hydraulic pressure in the hoses. I was in a hurry, so I tried forcing the connectors onto the pump. The next time I hit the lift control, I started losing a lot of hydraulic oil from the quick connector. 

Quickjack hydraulic pump releasing its schmoo

It didn't take long to figure out the problem - forcing the connectors cut the o-rings in the face of the connectors. I trashed two connectors of the four female connectors. 

Notice the protrucing piece of O-ring left of the center pin

I was in the middle of raising the car and I wanted to get the next step of the job done, so I simply removed the bad connectors and made fixed hose connections, using 3/8" NPT unions, and a 3/8" bulkhead fitting to replace one of the pump male quick connectors. However, I had lost a lot of fluid. I went to my automotive fluid bin and grabbed a bottle of brake fluid. Big mistake. The spec is for automatic transmission fluid, and I added about a pint of brake fluid and got back to business. 

Two days later I went to lower the car - and the cylinders wouldn't hold the car raised without the buttons pressed. I had difficulty removing the lift locks so that I could lower the car. Fluid was bypassing the check valve that holds the car in the air when there isn't any button input. I removed the check valve, and found little bits of white plastic jamming the check valve open. 

Quickjack check valve - marked with a CV on the valve body.

Not good news - but I immediately realized the contaminated fluid was the probable cause. Once I was done with the Quickjacks, I drained all the fluid from the system - removed the reservoir, removed the quick couplings from the hoses, and stood the jacks up to drain the cylinders by gravity. 

Draining fluid from hoses and jack cylinders by gravity

When I opened the reservoir, that's where I encountered the real mess. Bits of white plastic suspended in hydraulic fluid. Larger chunks in the bottom of the reservoir. The inlet strainer was detached from the inlet elbow, and just lying in the bottom of the reservoir.  

Inlet strainer (round) detatched from inlet elbow.

Bits of white plastic in the reservoir

Inlet strainer missing its attachment hardware (likely made of the white plastic which dissolved)

White plastic in the inlet port of the pump

More white plastic in the pump inlet port

I don't have a replacement inlet strainer yet. I have seen all metal inlet strainers and inlet elbows on the internet - but I'm having difficulty getting my hands on them. For now, I've replaced all the fluid with clean ATF and I'm running the jack without the strainer, just the inlet elbow. I'll drain and flush the fluid a second time once I have an inlet strainer to install. 

A few recommendations from what I've learned the hard way.

1.    Put a label on your quickjack hydraulic reservoir near the fill port - "ATF Only"
2.    Always hold the "down" button for 5 to 10 extra seconds when descending the quickjack, to release as much pressure as possible from your hoses before disconnecting them. This helps prevent residual pressure buildup in the hoses. 

Not my finest hour - but hopefully the information in this post helps someone else avoid the same issue in the future. 


Share:

BMW E60 / E61 Rotor Repair - COVID Lockdown Parking Rust and Brake Vibration

 When the COVID lockdown hit back in March, daily commuting stopped, kids were pulled from school, shopping essentially stopped except for weekly trips to the grocery store, and the BMW wagon went from use 4 to 6 times a day to a couple times a week. The drop in use was dramatic, and one result of this was a couple of instances of the brake pads bonding to the rotors with corrosion. You would go to use the car, all the brakes would be stuck, and after a few seconds of throttle, eventually the corrosion bond would break and the car would start rolling normally. 

BMW E61 535xi Front Rotor
Use of the car has gradually returned, and we did a local road trip in August. The brakes in the car were completed replaced when I did the turbo project 2 years ago, since then the car has only travelled about 20,000km. During the road trip I noticed minor brake pedal vibration - more apparent during light braking, less apparent with a bit more force on the pedal. 

When I brought the car into my garage in September to look at the low boost pressure issue, this was on my list of issues to repair. 

Rust ridges on front rotor left from pads freezing to rotor
I thought about purchasing new pads and rotors to sort out the issue, but 20,000km is next to no use, and I wanted to avoid the cost and the waste. I got onto google and looked for brake rotor turning services. At one time this was common, now, almost impossible to find. There was one machine shop in east Montreal that gave me a reasonable quote for turning the rotors, but when I went to drop them off, the machinist had sufferred an accident and would be off work for a month. No go. 

Frozen brake pad prints on the front rotor

So - if a part is broken, you can't really break it any more trying to fix it. I decided to try sanding the rotor surfaces with a Dewalt 5" orbital sander with 200 grit paper, to try to remove the ridges. 

Frozen brake pad prints on the front rotor

I sanded the complete surfaces, front and back, of both disks. I did two passes, not wanting to remove too much material and creating a bigger problem than I already had. I was careful to spend the same amount of time and pressure as equally as possible around the surface of the disk, just spending slightly more time on the ridges left by the various brake pad prints on the rotor surface. I didn't try to completely remove the brake pad prints, but smooth them out and hopefully reduce the pedal vibration. 

Front disc following sanding - pad outlines are still visible.
The sanding removed some of the ridges left during the pad bedding into the rotors. I knew that the pads would have to bed in again, so I was patient for the last month and tried to modulate my brake pressure to allow that to happen gradually. 

I would say that this has largely solved the problem, although, with very light application of the brakes there is still a slight vibration. With normal stopping pressure, the vibration is not apparent. It seems to have improved the braking feel, but it's not perfect. It seems to be improving with time however, so I'll let it go for another month or two and report back whether the problem resolves itself. For now - I've saved the cost of a pair of rotors and pads. So far, so good. 


Share:

BMW Underbody, Suspension and Rear Bumper Rust Repair with POR-15 System

While I had the BMW wagon in the garage replacing the rear axles and sorting out the turbo control vacuum issues, I noticed the start of some corrosion in critical areas - on the steel body near the rear subframe and brace mounts in particular. 

Rust bubbling the paint near the spare tire well - frame stiffener mount

I had some time so I decided to take action now to avoid larger problems further down the line. Two years ago, when I did the turbo replacement project, I also dropped the differential to give it a thorough cleaning, replace all the seals, and paint the steel body. At the time, I used Tremclad spray paint. After 2 years, 2 winters on the road, the rust was coming back and I was almost back to where I started. From some research on the internet, I found the POR-15 system - a polyurethane based prep and paint system that seemed to be much more durable, so I decided to give that a try. 

Rust returning to the differential case - 2 years after Tremclad application

The first component I cleaned up and painted was the right front bearing carrier. I had the drive axle out of the car to repair the oil leak, and some of the suspension components disconnected, so this was a good time to access the part and get it done. 

Bearing carrier - loose rust removed, degreased, and treated with the rust conversion primer.

The POR-15 system is comprised of a few basic steps:

  • Remove loose rust
  • Degrease using the POR-15 degreaser
  • Prime using the rust conversion primer
  • Paint - at least two coats - using the polyurethane paint.
Bearing carrier painted with POR-15 Black Paint

What's interesting with the system is that the degreaser and primer are both water based - and the paint required humidity to cure. This allows you to perform the steps fairly quickly one after the other. You don't need the part to be perfectly dry before painting (although you don't want any standing water on the part which may affect curing by causing bubbling under the paint). 

Surface rust on the rear bumper

More surface rust on the rear bumper


Rust on right side rear bumper mount

I had pretty substantial rust on the rear bumper, trailer hitch and bumper mounts. Large areas of paint were flaking off the trailer hitch, and large areas of the rear bumper were rusting badly. 

Loose paint and rust removal with 3" carbon steel wire cup brush on grinder

I pulled the rear bumper and mounts from the car, and the trailer hitch. I used a 3" cup brush on my Dewalt 20V grinder to remove loose paint and rust from the parts. It took about an hour to do all the parts - there was substantial rust and the cup brush worked fantastically. What a tool, highly recommended. 


3" Wire Cup Brush - great tool for cutting through paint and rust

With the parts cleaned, I washed them with soap and water to remove all the loose scale and grinding dust, prior to degreasing. 

After loose paint and rust removal, rinsed and ready for degreasing.

To degrease the parts, you use the POR-15 degreasing solution, diluted 4:1 with hot water. I use a plastic brush to scrub the parts and get into hard to reach areas. When complete, rinse the parts with hot water. 

Immediately after rinsing, you can do the rust conversion primer since it is water based. Apply the rust conversion primer to all bare and exposed rust and metal. I use a 1" paint brush to scrub it in as good as possible. The instructions suggest you leave the surfaces wet for at least 20 minutes, I went back and reapplied the primer about 5 times over the course of an hour to ensure a good application. 

POR-15 Metal Prep and Degreaser


POR-15 Rust Conversion Primer applied - it's slightly foamy - keep it wet for the entire treatment time

Once the rust conversion treatment is complete, rinse the parts off with hot water and allow to dry before the paint application. 

Bumper surface following rust conversion primer treatment. 

The POR-15 coating comes in a limited number of colours for various applications. There is Gloss Black, Semi-Gloss Black,  Silver,  Gray  and Clear. In addition, there is a high heat caliper paint available in Black,  Blue,  Red,  Silver and Yellow. I have the Silver, Gloss Black and Silver caliper paints. For touchups on the underbody steel, I used my silver paint, just so that it wouldn't contrast too badly with the seafoam green factory color. For the suspension parts, rear bumper and hitch, gloss black obviously from the photos. 

POR-15 Gloss Black applied to the trailer hitch

POR-15 Gloss Black applied to the rear bumper and mounts, and trailer hitch

The paint application is pretty straightforward - I use disposable brushes so I'm not bothered with cleaning them. You need a minimum of two thin applications, applied before the coating cures completely. You can recoat once the initial application is dry to the touch with a slight finger drag (stickiness). If you allow the first coat to cure completely, you need to sand before the second coat - it's important to time your work. 


POR-15 Silver applied to rust touchups on the underbody (battery box next to suspension compressor)

I wasn't able to get up around the rear suspension mounts with a tool to remove loose paint, there is not a lot of access in those areas. I've ordered a dremel flex extension - will see if that allows me to get at the flaking paint in those areas and I'll post an update when I get that done. I really wanted to get all the corrosion protection done before this winter. 

Gloss Black POR-15 on the rear differential case. 

I painted the rear differential in the car. The Tremclad provided some protection, so I didn't have massive pitting and flakes of rust, so prep was pretty quick and easy. The differential is exposed to road salt and grit, so I'm looking forward to how well the POR-15 holds up over time. 

Reinstalling the bumper and hitch components - spacer washers for bumper held on by masking tape

It was totally worth removing the hitch to treat the rust on the hitch - there is no way I could have done a proper job of it on the car. It's common to see rusty hitches - but I hate seeing the rust on my car. If I'm going to keep it, I want it to look good. 

Ready to lift the trailer hitch back onto the car

Reinstalling the hitch was fairly straightforward. I treated all the hardware by soaking it in the POR-15 primer overnight. Once everything was reassembled, I coated all the fasteners with the black POR-15 coating. 
I didn't completely disassemble the hitch, so I needed to pull the crossbar into position with a load strap

Rear bumper and hitch installed. Looks great in gloss black - will mostly be covered by the bumper cover.

So - another job done. Looking forward to seeing how well the POR-15 holds up over time. The final step was to apply fluid film in critical areas - around fasteners, where there is metal to metal connections, and inside the rear bumper cavity that was inaccessible for painting. One other comment - removing the rear bumper cover on the E61 is really quick and straightforward, much simpler than removing the front bumper cover. It only takes about 10 minutes, and it's probably worthwhile removing it periodically just to clean out the road salt and grime that collects within the rear bumper that caused a lot of the corrosion in the first place.

Sources


Some POR-15 products are available at Canadian Tire at a reasonable price. For everything that Canadian Tire didn't carry - I simply ordered from the POR-15 online store - quick delivery in a couple of days. Real simple.

Let me know if you have any comments or questions below. 


Share:

BMW Exhaust Heat Shield Repair

Some repairs will require removal of the complete exhaust system, in my case, removing the engine for turbo replacement, and replacing the left rear drive axles. With the exhaust removed, you have access to all the heat shields, and the driveshaft tunnel heat shield needs to be removed in order to inspect the driveshaft and the front driveshaft flex disc. 

In my case, I had some pretty serious galvanic corrosion of certain heat shield connections, particularly at the driveshaft tunnel brace, and a couple mounting holes for other various heat shields. This is a Canadian car, and it's used summer and winter, exposed to a lot of road salt and spray. I checked into replacement OEM parts from the dealer, but they are pretty expensive (probably due to the shipping cost of large, lightweight parts). 

I did a quick repair, which consisted of cutting a square of architectural aluminum, 23 gauge (0.57mm / 0.023") thick, larger than the hole to be repaired.

E60/E61 Muffler Heat Shield. 

I would contour the patch to the shape of the heat shield. It doesn't need to be exact, because the aluminum is pliable, and it will take the final shape required when replaced in the car. 

Patch riveted onto Muffler heat shield.

Inside view, note the gray spray paint which is cold galvanizing compound.

Once the patches are complete, I'll spray all the general area of all the fasteners, front and back sides, with a thick coating of cold galvanizing compound. The galvanizing compound contains zinc, which is sacrificial to aluminum on the galvanic scale, meaning that theoretically the zinc should oxidize before the aluminum when put back in service, protecting the aluminum from corrosion. 

Heat shield replaced on the car with a new body nut.

In one case, I installed the body nut reversed because the weld screw had broken off and was shorter than usual. 
Galvanic corrosion around the driveshaft tunnel brace

What's interesting about the galvanic scale and the corrosion of the aluminum heat shields, is that the heat shield corrosion is probably protecting the steel chassis and body of the car from some corrosion. 
Patch on the driveshaft heat shield, in the area of the driveshaft tunnel brace. 

Driveshaft tunnel brace was so badly corroded I simply replaced it with a new OEM part

Driveshaft tunnel brace - bottom side

The heat shield repairs that I did 2 years ago and just recently inspected have been holding up will, with no further issues. 

One maintenance habit I'll make now that I'm committed to keeping the car until it runs into the ground will be to try to remove the underbody protection (not necessarily all the heat shields) and get underneath the car to spray off all the salt following the winter driving season. The amount of salt and road sand that the underbody protection can capture is impressive. 

I'll do a separate post on the corrosion repairs I've done on the body, and the rear bumper. More to follow. 


Share:

BMW N54 Twin Turbo - Diagnosis and Repair - 0030FF Low Boost Pressure Error Code

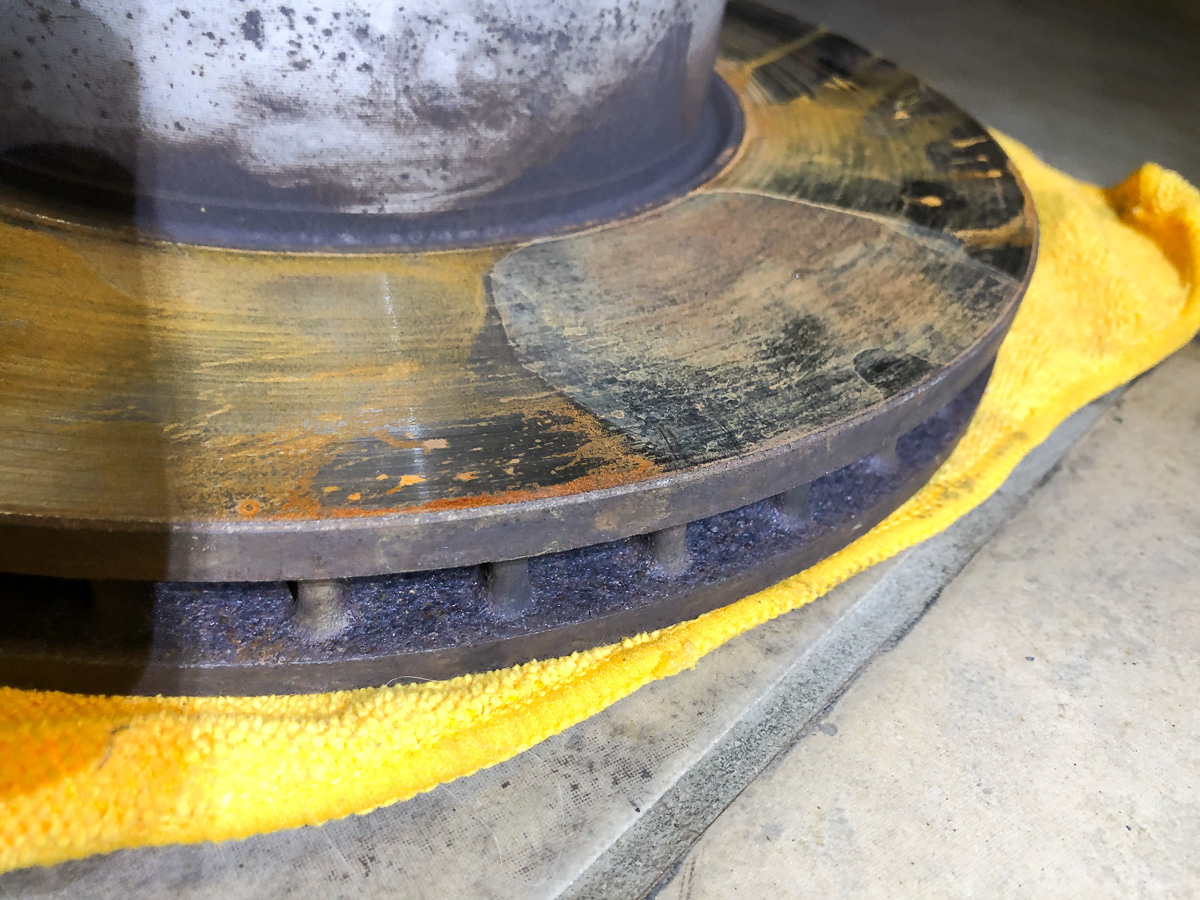
I got a check engine light this August while on a family road trip. 205,000 km (145,000 miles) and I replaced both turbos 2 years / 15,000 km ago. The fact that it probably wasn't the turbos was comforting, but it still bothered me. I had a few other issues to sort out with the car - an oil pan leak and the replacement of both rear drive axles (leaking grease), so I figured I would get the car up on the Quickjacks and sort all this out at one. 

Low boost pressure can be caused by 3 main reasons:

1. Bad turbos (worn wastegate bushing, wastegate rattle issue). Turbo is unable to generate boost because the wastegate valve can't close completely, preventing the exhaust turbine from receiving energy, or more sinister failure such as worn or seized bearings; 

2. Vacuum control issues - turbo wastegate actuators not getting enough vacuum when demanded by the ECU - due to bad Pressure Controllers, bad Actuators, or vacuum leaks / blocked or collapsed vacuum lines.

3. Charge air duct leaks / burst charge air ducts, air duct connections have popped open, or Pop-off valves are disconnected from the charge air pipes. If boost is leaking, the pressure sensor won't detect boost. There's also a chance the charge air pressure sensor is faulty. 

A wise person once said, don't rule things out because you think they're fine, someone else said they're fine, or that you think they can't be the problem. They might actually be the problem, so make a diagnosis plan from most likely to least likely and be systematic.

Step 1 - Turbos

I had the advantage of having the exhaust system off the car (in order to remove the left rear drive axle), and the front right drive axle and bearing support removed (in order to repair the oil pan leak). So access to the downpipes, and rear turbo actuator was pretty good.

The first item to check were the wastegate bushings - I could access the rear linkage - everything was tight, nothing was loose. As expected for an almost new turbo. I expect that the front will be the same. 

Step 2 - Vacuum Control Issues

I disconnected the vacuum lines from the two wastegate actuators, where they combine and connect to the pressure controllers. I picked up a Mityvac handheld vacuum pump to help with the diagnosis. I then tried actuating the wastegate actuators - the front turbo actuator worked fine - I could develop 20 inhg of vacuum no problem, I could hear the linkage moving, and when vacuum is released, I could hear the linkage releasing. No problem with the front actuator. 

Testing the front turbo actuator in car, using the hose to the pressure controller. Holding vacuum.

The rear actuator was a different story. Apply vacuum to the line - and nothing. Vacuum would not build in the line, and the actuator would not actuate. I replaced these vacuum lines two years ago with the vacuum line supplied with the Turner Motorsports N54 turbo kit, the vacuum lines should be fine. So I decided to remove the actuator since it was accessible above the downpipe and test the actuator out of the car. 

Some gymnasitcs to remove the rear turbo actuator, but not impossible. 

When I tested the rear turbo actuator directly, it worked fine, no problem at all. It turns out the vacuum line I installed 2 years ago wasn't suited to the heat, and had essentially crumbled and collapsed. 

Rear turbo actuator out of the car

Note the breaks in the vacuum line. First issue found. 

So - I ordered 3 metres of 3.5mm silicone vacuum tubing, which should withstand the heat better. I wasn't finished with diagnosis on the vacuum system, I also tested the pressure controllers. 

Testing the pressure controllers was pretty simple, you can do this in the car. To test the pressure controllers, disconnect the two hoses and the electrical connection, apply vacuum to the inlet port (from the vacuum reservoirs) - and the pressure controller should be closed, and allow vacuum to build without releasing it. Both my controllers failed this test - they were leaking vacuum to the outlet port (to the wastegate actuators). I could tell because I could only build vacuum with the pump holding my finger over the outlet port. Second test would be to build vacuum, then slowly let it off by applying quick pulses of 12v to the controller electrical contacts (you can use battery power and test leads) - the pressure controller should allow you to slowly and evenly drop vacuum over several pulses. A bad pressure controller may let off all vacuum with a single pulse of 12v. Third - the pressure controller should be able to hold vacuum even during vibration (you can apply vacuum then tap the end of the controller with a small wrench or screwdriver). My controllers would lose their vacuum with minor tapping - when holding my finger over the outlet.

So - new pressure controllers ordered as well. That covers the vacuum control system diagnosis.

Step 3 - Charge Air Ducts / Air Leaks


This is fairly straightforward - just inspect the pressure side of all the air ducting around the engine. The only difficulty is that accessibility is poor, it's difficult to see everything. I was fortunate that I had the engine out of the car 2 years ago - I have a pretty good idea of where all the ducting runs and could feel around and use an inspection mirror to make sure everything is connected properly. Removing the underbody panels is necessary under the engine - so you can see the intercooler duct connections and make sure they're solid. In my case - I found a transmission oil cooler hose leaking onto the left intercooler connection, but all the intercooler hoses were fine. Check out my O-Ring repair for the transmission oil cooler quick connect fittings here. 

Left intercooler charge air connection. Solid, but covered in transmission fluid from a leaky quick connector. 

From above, you can inspect the charge air ducts arriving under the air filter. Both of my Pop-off valves were connected properly, but I decided to remove them temporarily to test them. If the valves are not actuating properly, they can cause a intake manifold pressure when you let off the accelerator. Using the handheld vacuum pump, connected to the Pop-off valve, you should see the valve open when vacuum is applied. In my case, only the front valve was working properly, the rear valve wouldn't open under vacuum. Another part to replace. 

Testing the Pop-off valve. You should see the valve open through the connection to the charge pipe.

Repairs


Replacing all the vacuum lines was pretty simple - just go piece by piece through the system and make sure you get the inlet / outlets on the pressure controllers in the right order. The RealOem vacuum line routing image helps here. 

Replacing the pressure controllers - also simple. I went with the Piersburg OE parts from Pelican for this. Good value. I tested the new pressure controllers with the handheld vacuum pump before installing them - they held vacuum perfectly out of the box - much better than the original ones. 

New Pressure Controllers installed

Replacing the Pop-off valve - also simple, 10 minute job. The connectors are a bit tricky working underneath the air filter housing, but patience gets the connection done. Don't forget to reconnect the vacuum lines. 

Road Test


With all the repairs completed, (and once the axles were back on the car, and the exhaust replaced), I got the car out on the road and tested it out. It certainly felt awesome - the car accelerated as good as when I first got it at 78,000 km, if not a little better. 

Boost pressure data from Carly

I logged boost pressure using the Carly app - and managed to hit one peak slightly over 2 bar on the first run - better than any peak this year. Car was sustaining about 1.7 or 1.8 bar in long, sustained acceleration (0 to 60 mph). 

So - successful repair - car is running amazing again. If you have any questions - feel free to use the comments below. 


Share: